
Editor’s Note: This article is cross-posted from Katia Sae’s blog, To Boldly Go, and was originally published in March 2015.
“Beautiful things don’t ask for attention.” – Sean O’Connell, “The Secret Life of Walter Mitty”
I figured it’s about time to share some astrophotography tips. After taking 30,000+ images, I’ve learned a thing or two that I hope you will find helpful. However, I’ll be the first to confess that my gallery is more about quantity rather than quality for the simple reason of time. If I truly took the time required for each and every image capture, I’d still be exploring my first region. There are moments when I simply have to stop and take in the beauty of New Eden and try my best to capture a quality shot and that’s what this blog entry will focus on today. TLDR – Astrophotography is serious business!
Camera Control

We’re fortunate to live in an age of technology that allows us as capsuleers to focus on the subject, rather than the technical aspects of taking a picture. No longer do we have to worry or fuss over aperture, shutter speed, focus, etc, as all of that is taken care for us. We can now concentrate on the artistic aspects such as composition and framing. It’s quite honestly point and shoot today.
How to work your camera controls. Here’s the image capture command sequence:
- CTRL-F9 (Turns off the HUD)
- PrtScn (Captures the image) | MAC OS use Command (⌘)-Shift-3
- CTRL-F9 (Turns on the HUD)
You may want to setup a single command that executes the sequence for ease of execution and reliability. More than once I’ve found myself in a hostile system and was thankful I could quickly line up a shot, take it, and move on, with the execution of a single command
Depending upon your pod’s operating system, your images will be processed and placed in your data repository at the following or similar location:
C:\Users\UserName\Documents\EVE\capture\Screenshots
Beauty is in the Eye of the Beholder

The first rule is, there are no rules. Remember, there’s no right or wrong way to take an image. It is, after all, what intrigues or interest you, that moment in time you wish to capture, cherish, and share with others. So, as long as it’s pleasing to your eye, then you have achieved your goal. But as in all things, you’ll learn in time and experience to master your craft and instead of taking fair or good images, you’ll be taking great ones.
Rule of Thirds
Well, it’s more of a guideline than a rule but it’s a good one to follow and should be broken in the right circumstances. Beginning astrophotographers, or someone who’s in a hurry like myself, usually line up the main subject in the center of the image. It’s only natural, as humans we look directly at our subject of interest. There’s nothing wrong with that per say and it can work, but often times it fails to provide a balance and it can eliminate an interesting environment surrounding the subject. Remember, looking at an image is more than just looking at the main subject, because your eyes will want to wander. A good astrophotographer will capture the main subject in its natural environment as well as provide a balance to the scene.

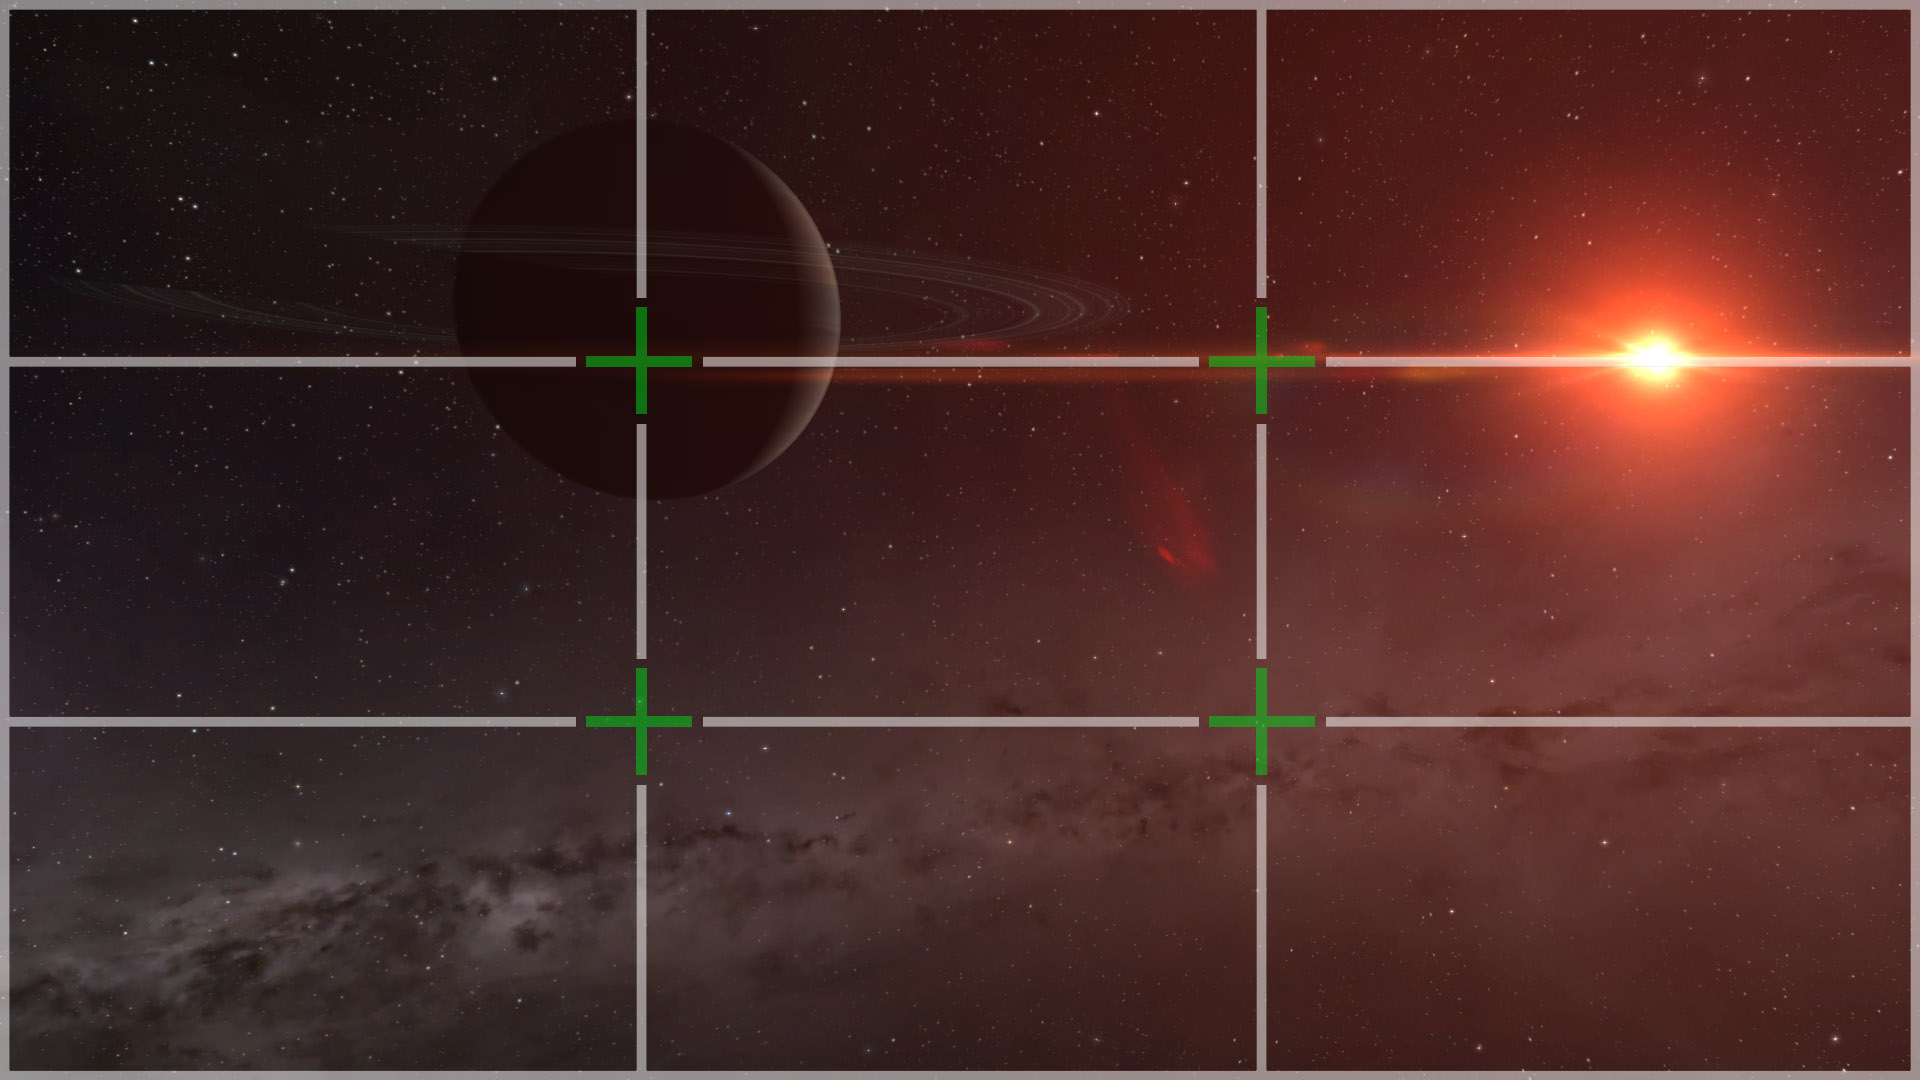
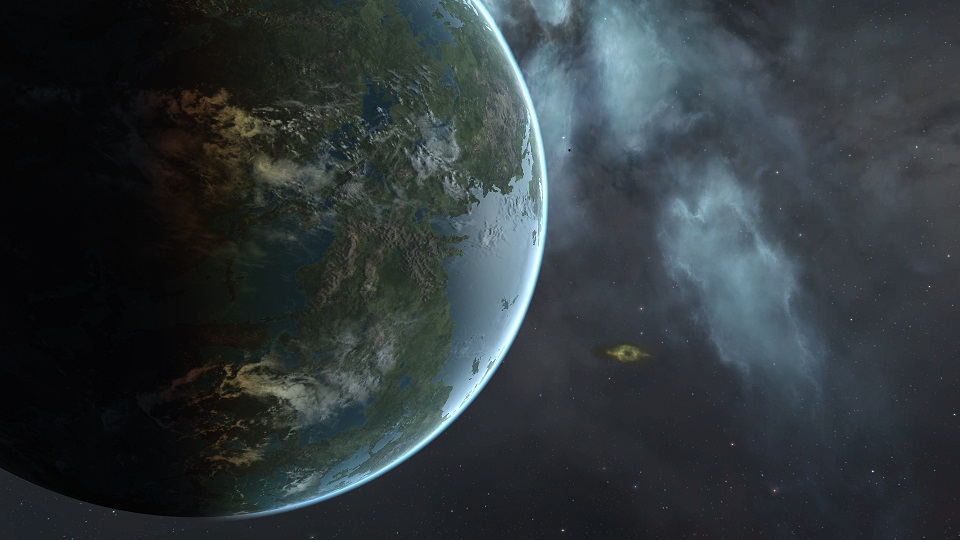
Here’s how the Rule of Thirds works. Break your capture resolution up into thirds along the horizontal and vertical axis and visualize nine equal areas on your screen. Now, where the lines intersect, imagine cross hairs, there should be four of them.

With the lines and intersections visualized, you now line up your main subject, as well as other things of interest, at the intersections and along the lines. Why? The thought process is it will provide a natural balance to the scene that your viewer will be able to interact with. Take advantage of lines and curves to lead your viewer on a journey around your image.
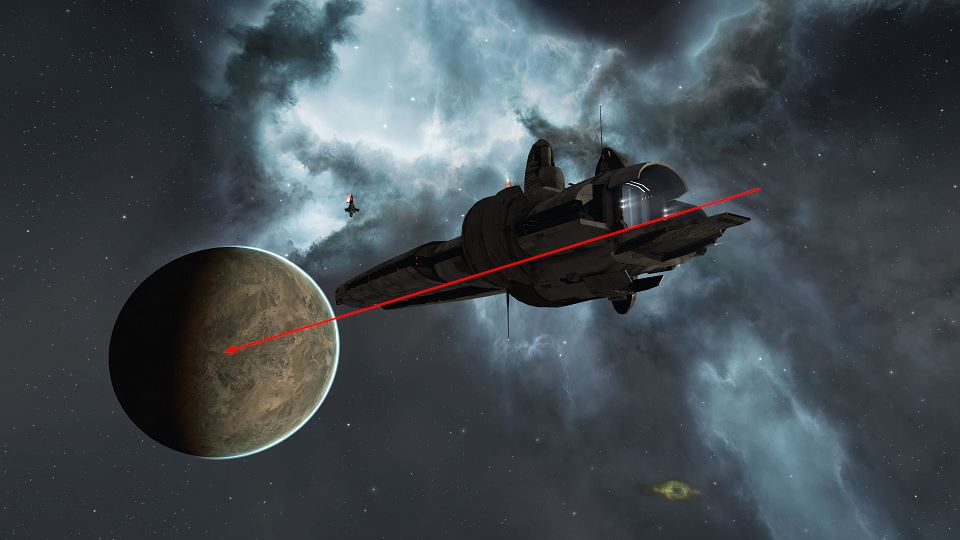
Framing

Mastering the Rule of Thirds is a great start to taking good images, but as you line up your shots, you’ll want to watch the outer edges and see if you can “frame” your subject. If possible, you can use other objects and/or the environment to provide a natural frame. Try to include natural lines and curves in a manner that will highlight, but not distract from the main focus. If you need to cut into your main subject, do so in a manner that looks appropriate. For example, making sure the object still looks whole and that the bulk of it remains.
You may end up bending or even breaking the Rule of Thirds to properly frame an image, but that’s fine if the end result takes a good picture and makes it a great one. Watch, however, because in general you don’t want to cut objects in half. Either position yourself or your camera to include them fully or eliminate them entirely.
There are however, times when cutting an object in half will enhance the frame, but only if it’s large enough to cover more than half of that particular edge. Again, not necessarily a rule, just a guideline, you have to experiment to see if the final image is going to look and feel right.

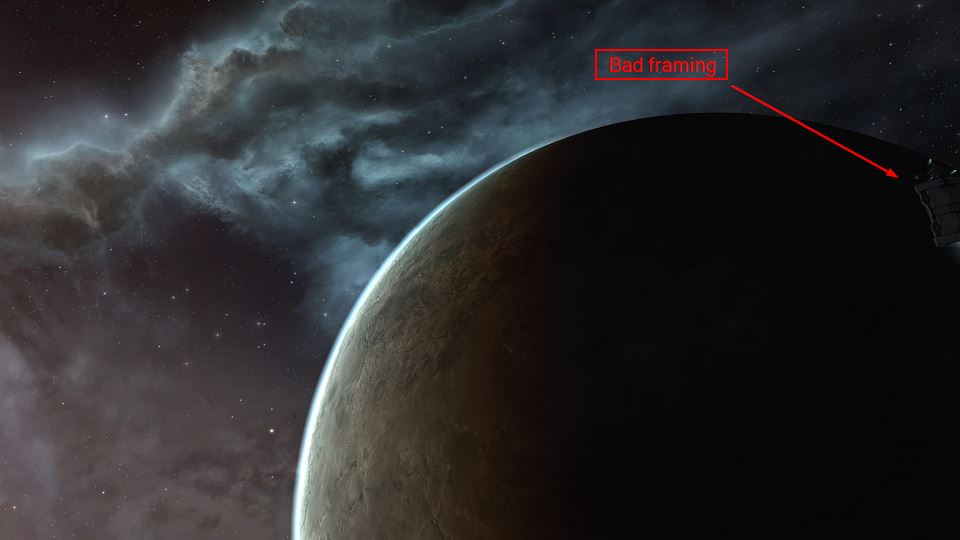
Taking a look at these two examples, we can see in the first one I’ve cut into the planet leaving some space to be seen behind it as well as cliping it along the bottom. A minor adjustment to the camera position takes care of that issue. In the second example, I’ve cut the customs office in half which really distracts from the overall image. Simply zooming the camera out moves the office completely into the scene and it helps to break up the bleak blackness of that part of the image.
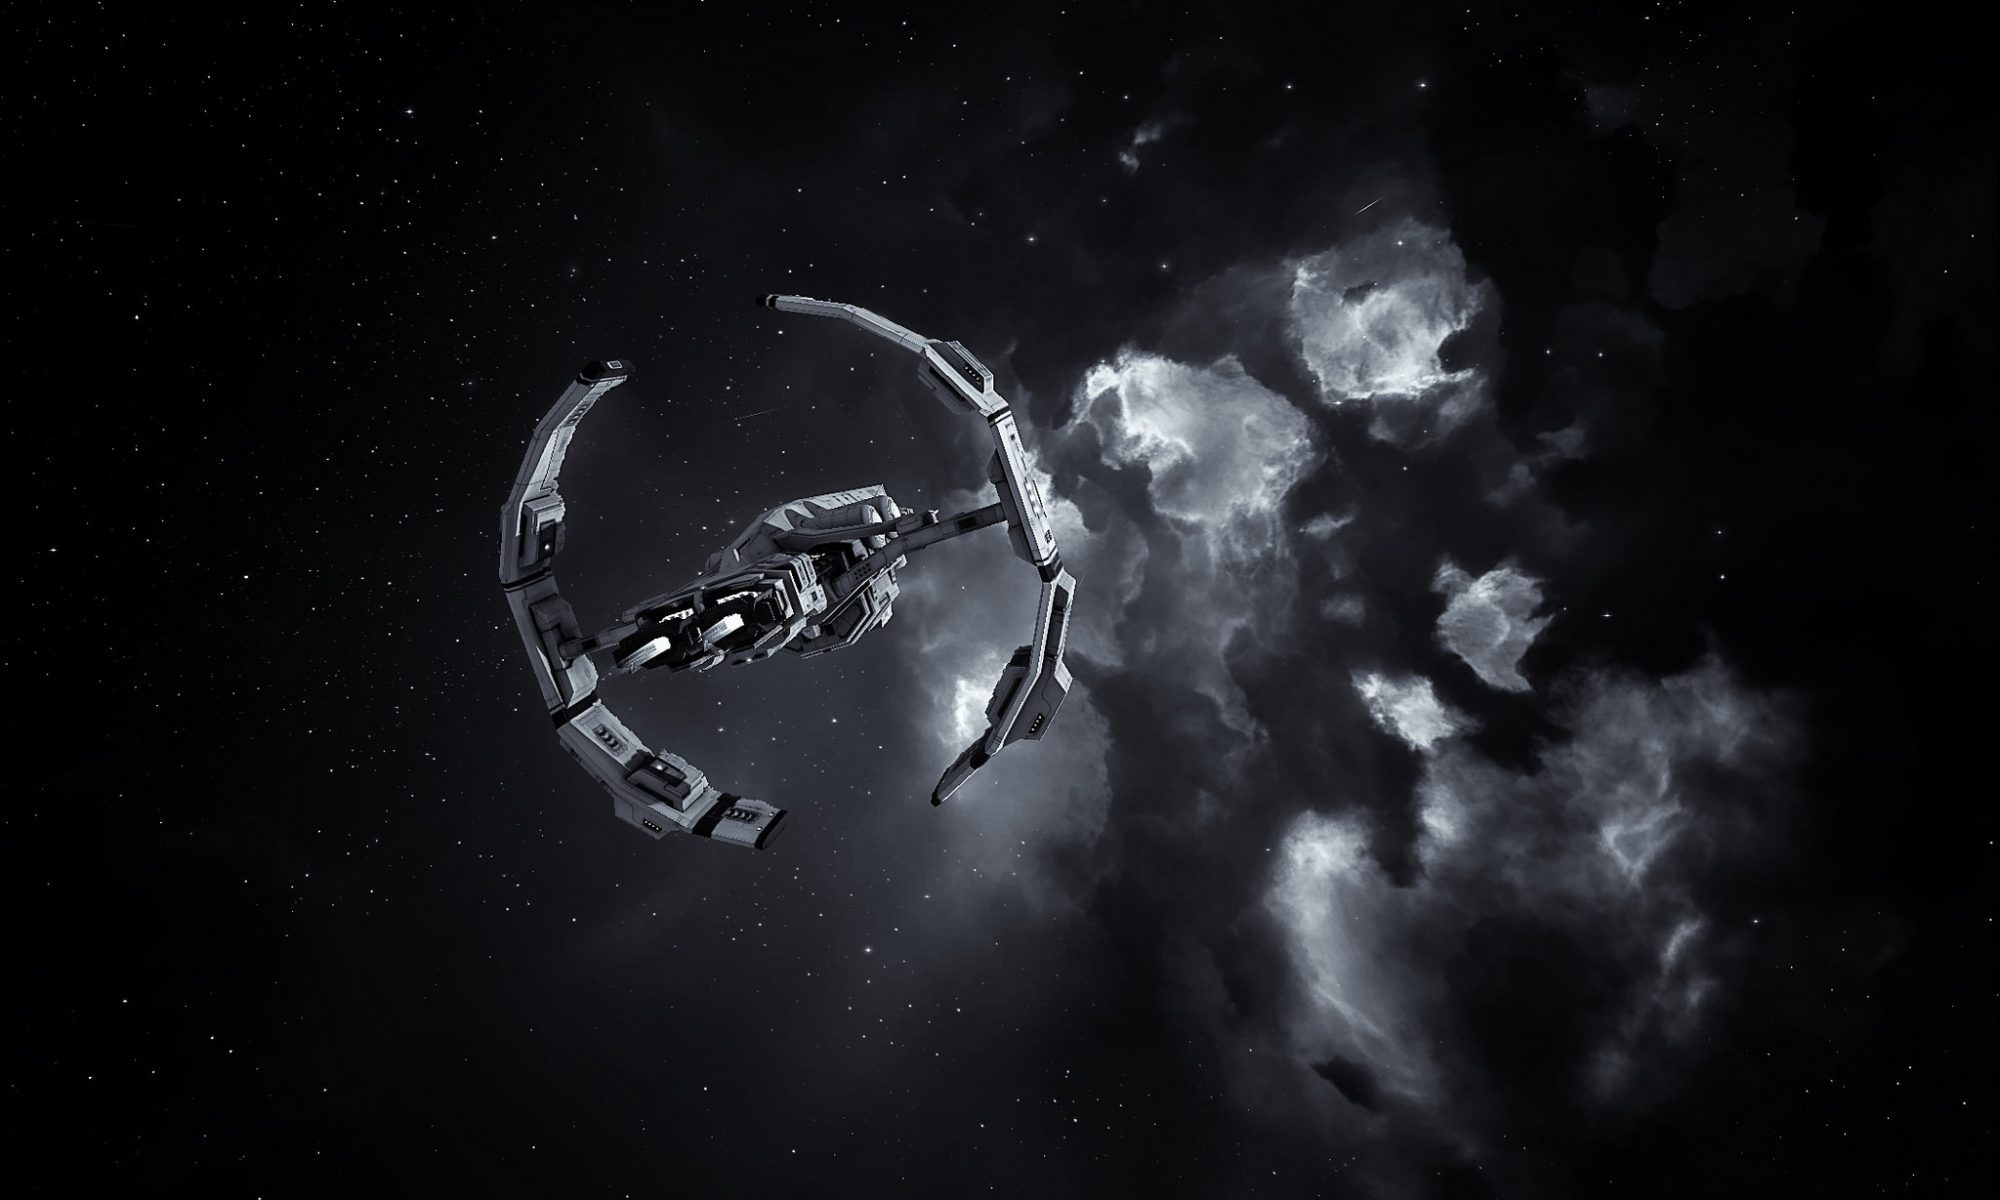
Contrast
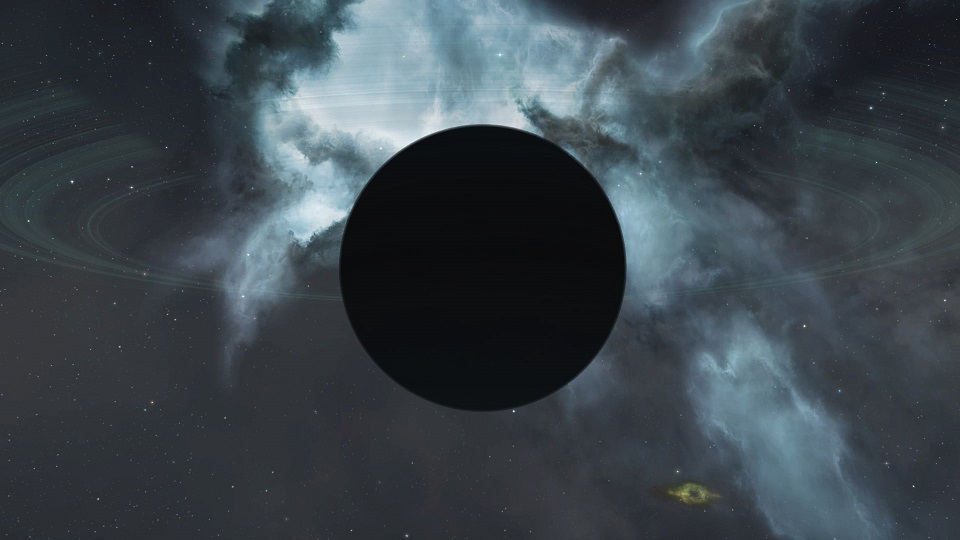
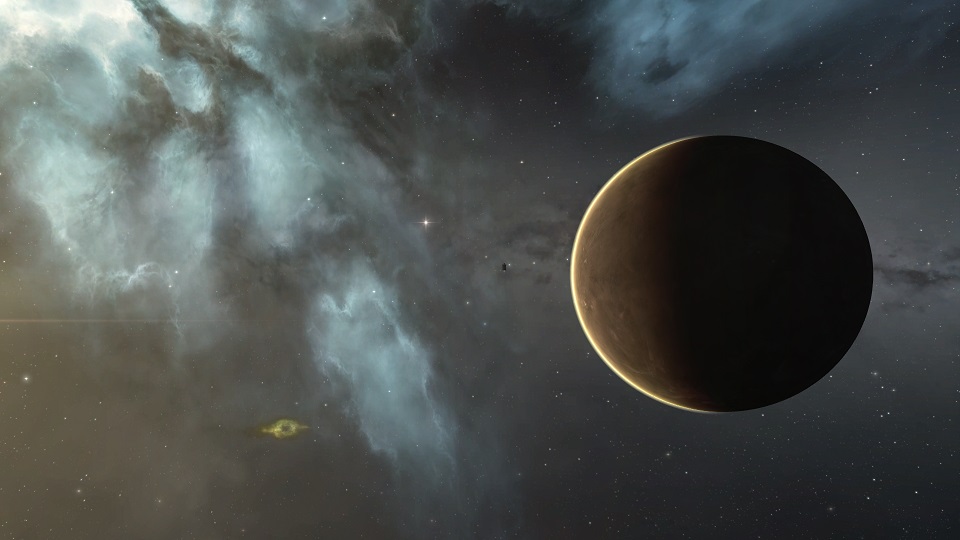
I’ve often heard that black and white photography is the most difficult to master. You may ask why, because it’s simply black versus white, but therein lies the catch. It’s not about black and white at all, it’s about shades of gray. (Not fifty shades of gray, mind yourself!) A great black and white photographer succeeds by taking a picture with as many shades of gray as possible. From the blackest of blacks, to the whitest of whites and all the grays in between. The same is true in color photography in trying to show stark contrast with shades of color. See how many shades of color you can achieve. For planets, I try to capture the shades from the night side to the light side. A fully sun lit side of a planet can be dull, but there are the extremes, like silhouettes, that can provide for some truly amazing shots.
Interesting Textures
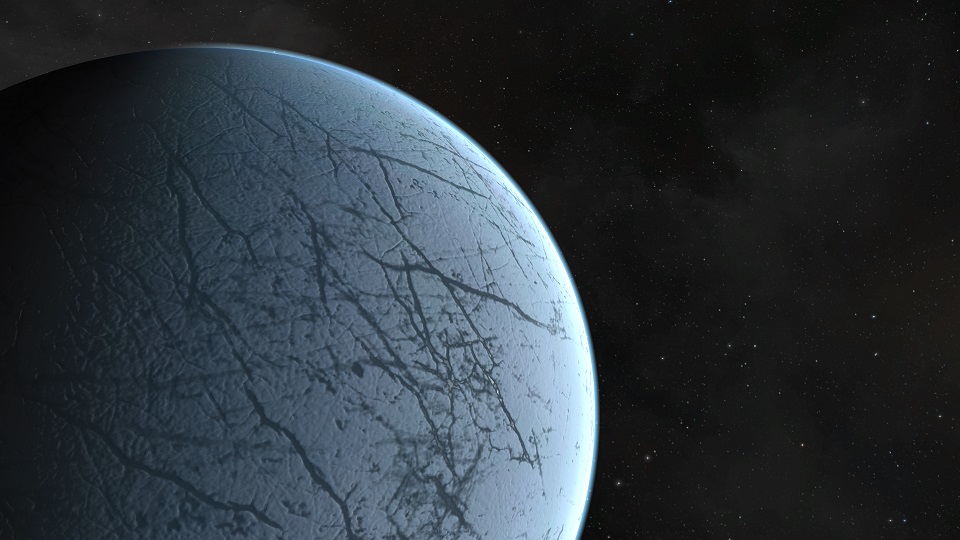
Other than colors and contrast, textures can provide an interesting subject matter as well. After taking so many pictures of planets, they all begin to start looking alike, and you have to turn to something else to make it interesting. You may not think of planets in terms of textures, but they do indeed have them. Especially from high in orbit, where the details of a civilization begin to vanish, and the oneness of the planet begins to prevail. A famous astronomer once referred to his home plant as the “Pale Blue Dot”. Look for textures in your images and see if you can pull them out by highlighting them via the rule of thirds and framing.
Leading the Viewer
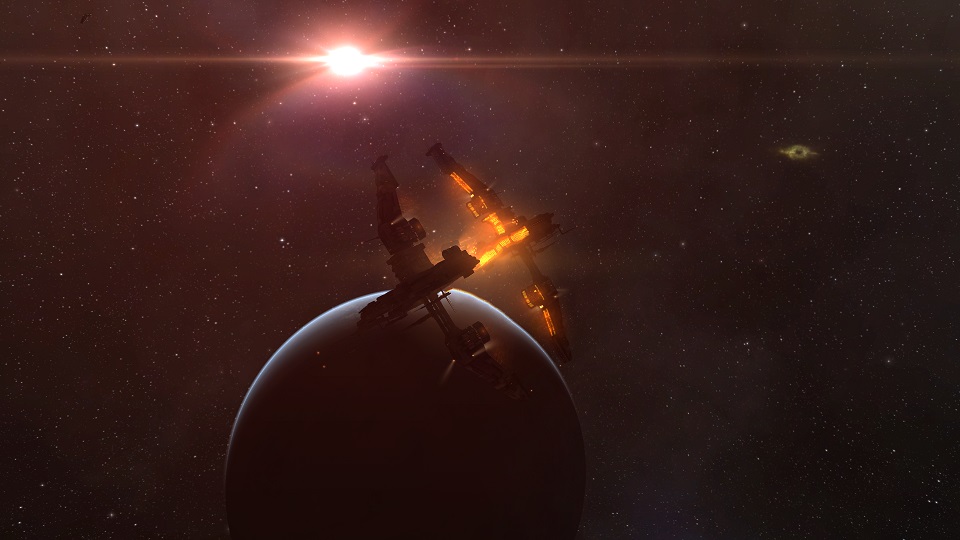
Be on the lookout for minor subjects that can help lead your viewer to your main subject. There are many interesting things in space, use them to your advantage. For me, the planets are my main subject matter in all of my shots, but I don’t always have them front and center. Sometimes they’re way off in the distance, but I always have the planet in there somewhere. In those cases I try to use nearby subjects and/or the environment to help the viewer find my main subject. Human eyes naturally follow lines and curves, so it’s fairly easy to find them and then utilize them to pull your viewer in.
Ordinary to Extraordinary
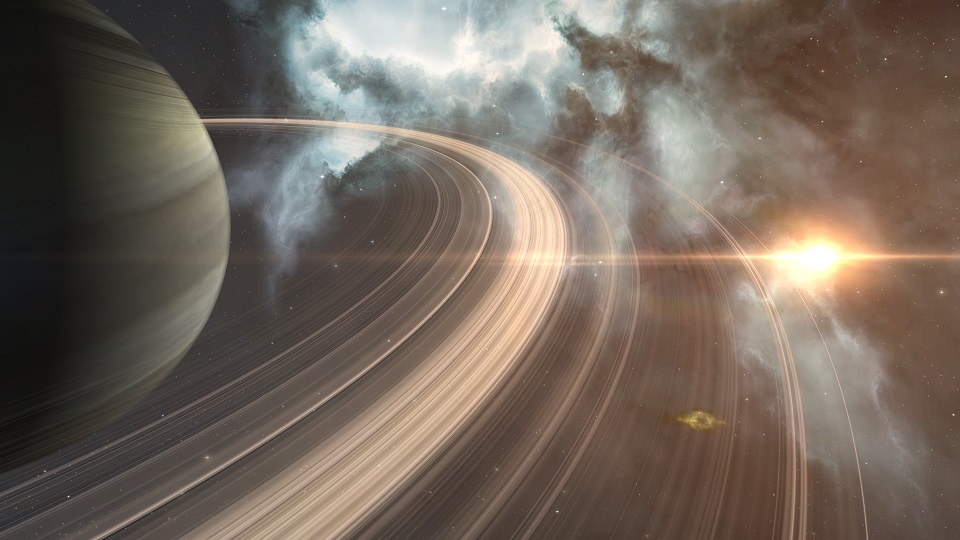
This is a difficult one, as it just comes from experience and many times, there’s just nothing in the scene nearby that can help to take what is an ordinary picture and make it into an extraordinary one. But that shouldn’t stop you from trying, nor preventing you from taking the picture anyway, if nothing else for the experience of it. Just be aware of your surroundings and see if perhaps a better position between you and the main subject will help you to pull in other things that can provide some additional interest or contrast. In the case of astrophotography, you may be able to position yourself to utilize the sun, for example, to help make some rings really pop out. Or maybe you can create an artificial sunrise or sunset. Don’t forget about other subjects like your own ship to help spice up a scene. Once you start looking, you’ll begin to see some things you can use. Move around from moon to moon, or objects like customs offices and stations, you just never know what you may find that will turn that first image you liked into something that you’ll love.
Final Words
Go out and have fun, learn by doing, there’s no better way. Sure, you’ll take some bad images, just look in my gallery, but you’ll start getting those great shots that will have others asking for more. Enjoy yourself and share, don’t be afraid of what others think. Not everyone is going to “get” your image, but you really didn’t take it for them anyway, right? Besides, there are many more who will see what you saw and that’s the greatest feeling of all, when others share in your experience.